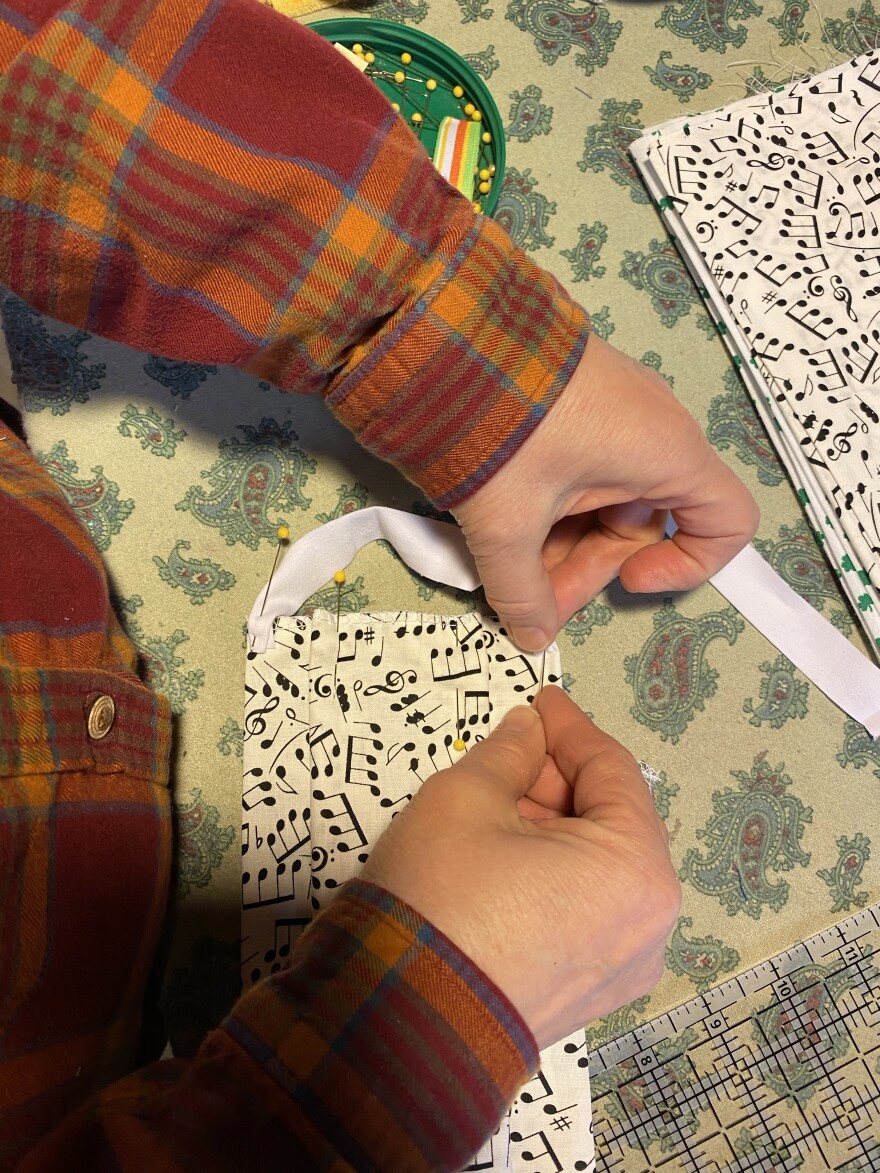
The CDC now recommends covering your face when you enter public places such as grocery stores or public transit stations. (More on that from NPR here.) Proper manufactured medical masks, especially N-95 particulate masks should be saved for health care personnel.
You can use a tightly fitting bandana if you can't sew, there are also TONS of tutorials on the internet, including for no-sew masks. This tutorial is for a simple sewn mask that you can make from things you most likely have at home.
If you are a sewist, groups across the country are forming to make masks and other gear needed by health care workers and other essential employees. You can find out more about those efforts at getppe.org
These masks will not protect you from getting COVID-19. The best way to avoid catching it is to stay home and away from other people. Health care officials advise that handmade masks will not protect the wearer but they could keep you from spreading COVID-19 if you have it and are asymptomatic or pre-symptomatic. Here's some more information on the effectiveness of homemade masks from NPR's Goats and Soda blog.
The rest of this post is based on my personal experience with mask-making at home during the coronavirus pandemic, it's different from the usual news I write and report for public radio.
This design was created by my mom based on a request from a friend of a friend who wanted masks with a pocket for a filter. They are fairly easy to produce and she's made more than 200 and given them away to various entities including her school kitchen staff co-workers who hand out food to families and our local post office.
Happy mask making!
How to make a Mask: The tutorial can also be found in PDF version here.
What you need:
- One 8.5” x 21” (6" x16" for child size) rectangle of cotton fabric--A sheet or pillowcase can work for this, you want cotton with no stretch
- Two .5”x6” (.5"x5" for child size) strips of knit fabric--Old t-shirts work well for this part
- An iron
- Eight pins
- A sewing machine--You could sew these by hand as well
Step 1:Wash
Wash and dry both fabrics before you begin.
Step 2: Cut
Cut your non-stretch cotton fabric into a 8.5” x21” rectangle. If you use pinking shears you can skip step three
Cut your knit into two .5”x6” strips. Cut across the width of the shirt, the fabric should stretch more long ways.If using a t-shirt, use a portion without any printing or design.

Step 3: Sew end
Fold over, iron and sew, using a straight stitch along one of the 8.5” sides. Or, if you have a serger, use that and skip the fold. You’re creating a basic hem so the fabric doesn’t fray.
Skip this step if you used pinking shears.
Step 4: Iron
Fold the sewn edge over half and inch, then iron it flat.
Then take the other end, fold it up to the third, then fold the half inch edge over so your fabric is in thirds with the folded edge on top. The folds create a pocket for an optional filter to be added.


Step 5: Sew edges
Take your folded mask and sew the outside edge shut with a zig-zag stitch. If you have a serger, sew it shut on that.
Step 6: Pin the pleats
Lay the mask on the table with the pocket opening face down (that is the back of the mask, the part that will go toward your face)
Fold the mask to create one box pleat (see picture) Put a pin on each side on each fold (four pins) The side with the pleat sticking up is the front of the mask, that will face out.


Step 7: Pin the elastic
Fold the ends of the t-shirt strip in thirds. Then pin it to the front of the mask at the corners (four pins)

Step 8: Sew the elastic and pleat
Using a zig-zag stitch sew along the two raw edges of the mask, sewing pleat and elastic in place. Make sure to back stitch on the ear loop ends so it stays in place and doesn’t tear off with wear. Take care not to run over your pins!
Wearing and Washing
*This mask is reusable. Wash it in hot water with detergent and a capful of bleach.
*To remove the mask: 1.wash your hands 2. hook a finger in each ear- loop to remove 3. hold only by the ear loops until you can place it in a bag to be laundered or directly into the washing machine. 4. Wash hands again
*To prevent glasses fog, tape the top of the mask to your nose with first aid tape or a band-aid
*Wash your hands before and after handling the mask. Be careful to have the box pleat and ear loop ends on the out-facing portion of the mask.

Contact Jennifer at jweingart@wvpe.org or follow her on Twitter at @jen_weingart
If you appreciate this kind of journalism on your local NPR station, please support it by donating at: https://wvpe.


